Wed Oct 30, 2019
I follow a few different UI profiles on Instagram. I find it a nice way to keep creating and get ideas flowing. Sometimes they’re inspiring because it makes me want to build something based on the designs I find, and other times it’s just fun to try and build interesting UIs that I come across. As developers it’s true we can wear different hats, but sometimes with design, it’s difficult not to think about how hard a design might be to build. Designers don’t have this issue, furthermore, they frequently design items that could be replacements for system UI components. As developers we rarely do this as it can seem counterintuitive or come across as reinventing the wheel.
But that’s what I’m going to do here. I came across this tab bar from plat4m and thought I’d give it a go. Before this I hadn’t worked with much Core Graphics or Animation stuff, so I thought it would be pretty interesting. It would also be the first CocoaPod that I’d publish. First of all I’ll walk through creating the UI with a Playground and then we’ll put it into action as a tab bar.
Let’s dive in!
Creating the curve
I had some idea about how to create a curve. I figured UIBezierPath was my friend here as I knew I could add lines and curves to it, so let’s start there.
func createCurve(at center: CGFloat, with radius: CGFloat) -> UIBezierPath {
    // 1
    let path = UIBezierPath()
    path.move(to: .zero)
    // 2
    path.addLine(to: CGPoint(x: center - radius.double, y: 0))
    // 3
    path.addQuadCurve(to: CGPoint(x: center - radius, y: radius.half),
                      controlPoint: CGPoint(x: center - radius - radius.eighth, y: 0))
    // 4
    path.addCurve(to: CGPoint(x: center + radius, y: radius.half),
                  controlPoint1: CGPoint(x: center - radius + radius.quarter, y: radius + radius.half),
                  controlPoint2: CGPoint(x: center + radius - radius.quarter, y: radius + radius.half))
    // 5
    path.addQuadCurve(to: CGPoint(x: center + radius.double, y: 0),
                      controlPoint: CGPoint(x: center + radius + radius.eighth, y: 0))
    // 6
    path.addLine(to: CGPoint(x: bounds.width, y: 0))
    path.addLine(to: CGPoint(x: bounds.width, y: bounds.height))
    path.addLine(to: CGPoint(x: 0, y: bounds.height))
    path.close()
    return path
}
Ok, this seems like a lot, but once it gets broken down it’s pretty straightforward. I’ve added an extension to CGFloat to do some handy parts like doubling and halving the value and reduce the amount of “magic numbers”.
- First we initialise a
UIBezierPathand we move it to (0, 0). AUIBezierPathis just one path that we will tell where to move to by adding lines and curves. - Next up we add a line to where we want our curve to start.
- This part is our first curve. Essentially what this does is add a line to an endpoint and tell it to bend at a certain point. You can see this is where we first set a y value that’s greater than 0 in our
toparameter. We then set a control point, this is where our line will bend.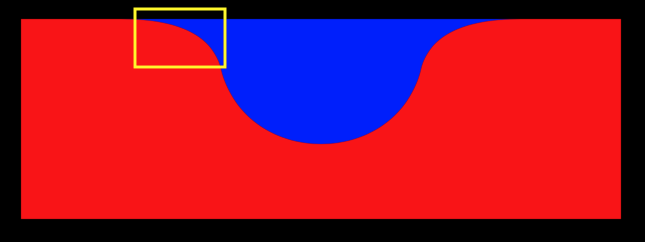
- Next up is another curve, but this time it’ll be a semi circle. This will be the bottom half of our curve. Again we set where we want this line to end in the
toparameter, and then we need to add two control points because this line is going to bend twice as opposed to the quad curve which only bends once.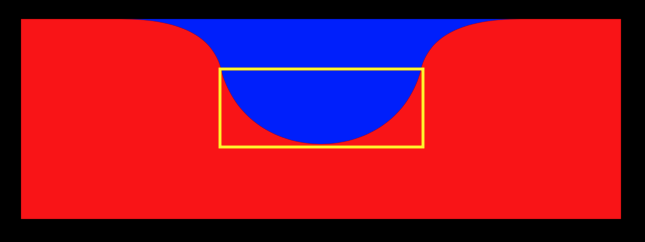
- Now we add another quad curve which will finish it off. So again we set an endpoint and a control point.
- Lastly for this, we simply draw the rest of the box by running around the view and drawing lines. If you notice we don’t draw the last line ourselves, we just call
path.close()and it does it for us.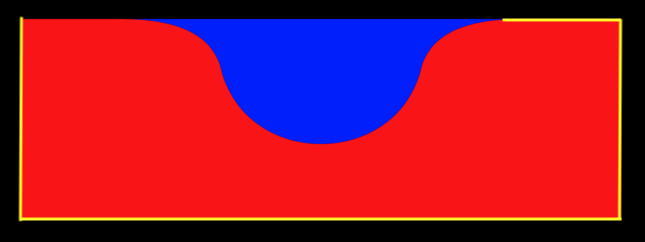
Ok that’s great! We now have a really nice start to our tab bar because we have this curve. Next up we need to animate it for when it switches between tabs.
Animating
Firstly we’re just going to create an animation that runs across the screen and back so we can understand how it works. For this we’ll use a CABasicAnimation. With the CABasicAnimation we can first set the item we want to animate and then configure the values and how it will perform the animation.
func createAnimation(to path: CGPath) -> CABasicAnimation {
    // 1
    let pathAnimation = CABasicAnimation(keyPath: #keyPath(CAShapeLayer.path))
    // 2
    pathAnimation.toValue = path
    // 3
    pathAnimation.duration = Constants.animationDuration
    // 4
    pathAnimation.timingFunction = CAMediaTimingFunction(name: .easeInEaseOut)
    // 5
    pathAnimation.autoreverses = true
    // 6
    pathAnimation.repeatCount = .greatestFiniteMagnitude
    return pathAnimation
}- First up we create our
CABasicAnimationand set what we want to animate which in our case is the path. We need to pass this in as aKeyPath. - Next we set the end value of our animation. Since this is a function to create the animation, we have just passed in the end path as a parameter, we’ll come back to this.
- Now we need to set the duration of the animation. I’ve put this in a Constants struct to avoid magic numbers.
- The animation can also take a timing function, which we set to be
.easeInEaseOutfor a nice animation. - It would be nice if the animation autoreversed, so let’s do that too.
- And lastly I’ll keep the animation running indefinitely for this example.
Tying it together
We can now use just these two functions and a little bit of glue to get a curve animating across the screen and back.
// 1
let subLayer: CAShapeLayer = {
    let subLayer = CAShapeLayer()
    subLayer.fillColor = UIColor.red.cgColor
    return subLayer
}()

func commonInit() {
    // 2
    let startPath = createCurve(at: 200, with: 100)
    let endPath = createCurve(at: 400, with: 100)
    // 3
    let pathAnimation = createAnimation(to: endPath.cgPath)
    // 4
    subLayer.path = startPath.cgPath
    // 5
    subLayer.add(pathAnimation, forKey: “pathAnimation”)
    // 6
    layer.addSublayer(subLayer)
}- We first create a
CAShapeLayer. This is the shape that we will alter to make it look like our desired curve. - We use our
createCurvefunction twice. Firstly to create where we want the curve to start, and then another one for where we want the curve to end. - Next we create our animation and pass in the path of our
endPath. This is used as part of thetoValuefor theCABasicAnimation. - We then set the path of our
CAShapeLayerto be the path of our starting curve. - Now we add the animation the sub layer. We need to give it a key as a parameter too. The key allows us to identify animations in each layer if we have more than one.
- Lastly we add the sub layer to our own layer. These functions are in a
UIViewsubclass so we can just add them directly.
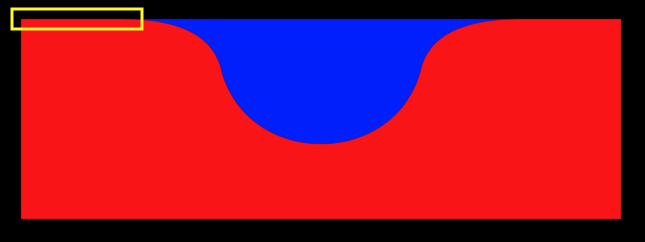
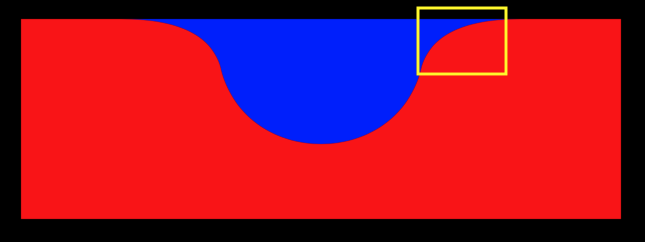
Seeing it run
Now when we put it all together we get the following
 We have a pretty good start here. Next up we’ll start using this as our tab bar. Follow along in Part 2
Spot something wrong? Let me know on Twitter